Tailscale site-to-site pfSense - Linux
How to set up a Tailscale site-to-site L3 connection between a pfSense homelab subnet and a Linux cloud VM subnet.
I’m setting up cloud-based monitoring for my homelab using an Oracle Cloud VM, and I wanted the cloud VM to be the single entry point to my infrastructure. For that I’m using Tailscale — not just client-to-site, but site-to-site so both subnets can reach each other without exposing anything publicly.
Note
Site-to-site L3 networking connects two subnets on your Tailscale network. Each subnet needs a subnet router, but individual devices don’t need Tailscale installed. This applies to Linux subnet routers only.
Warning
This won’t work with overlapping CIDR ranges or 4via6 subnet routing.
Network Layout
Two private subnets with no existing connectivity between them:
- Subnet 1 — Homelab: 10.57.57.0/24, router at 10.57.57.1 (pfSense)
- Subnet 2 — Cloudlab: 192.168.57.0/24, router at 192.168.57.254 (Linux VM)
pfSense Setup (Subnet 1)
pfSense runs on FreeBSD, and Tailscale’s support for it is more limited than other platforms, so there are a few rough edges.
Install Tailscale
Go to System > Package Manager > Available Packages, search for tailscale, and install it.
Configure Tailscale
Navigate to VPN > Tailscale.
Generate an auth key at https://login.tailscale.com/admin/settings/keys and paste it in.
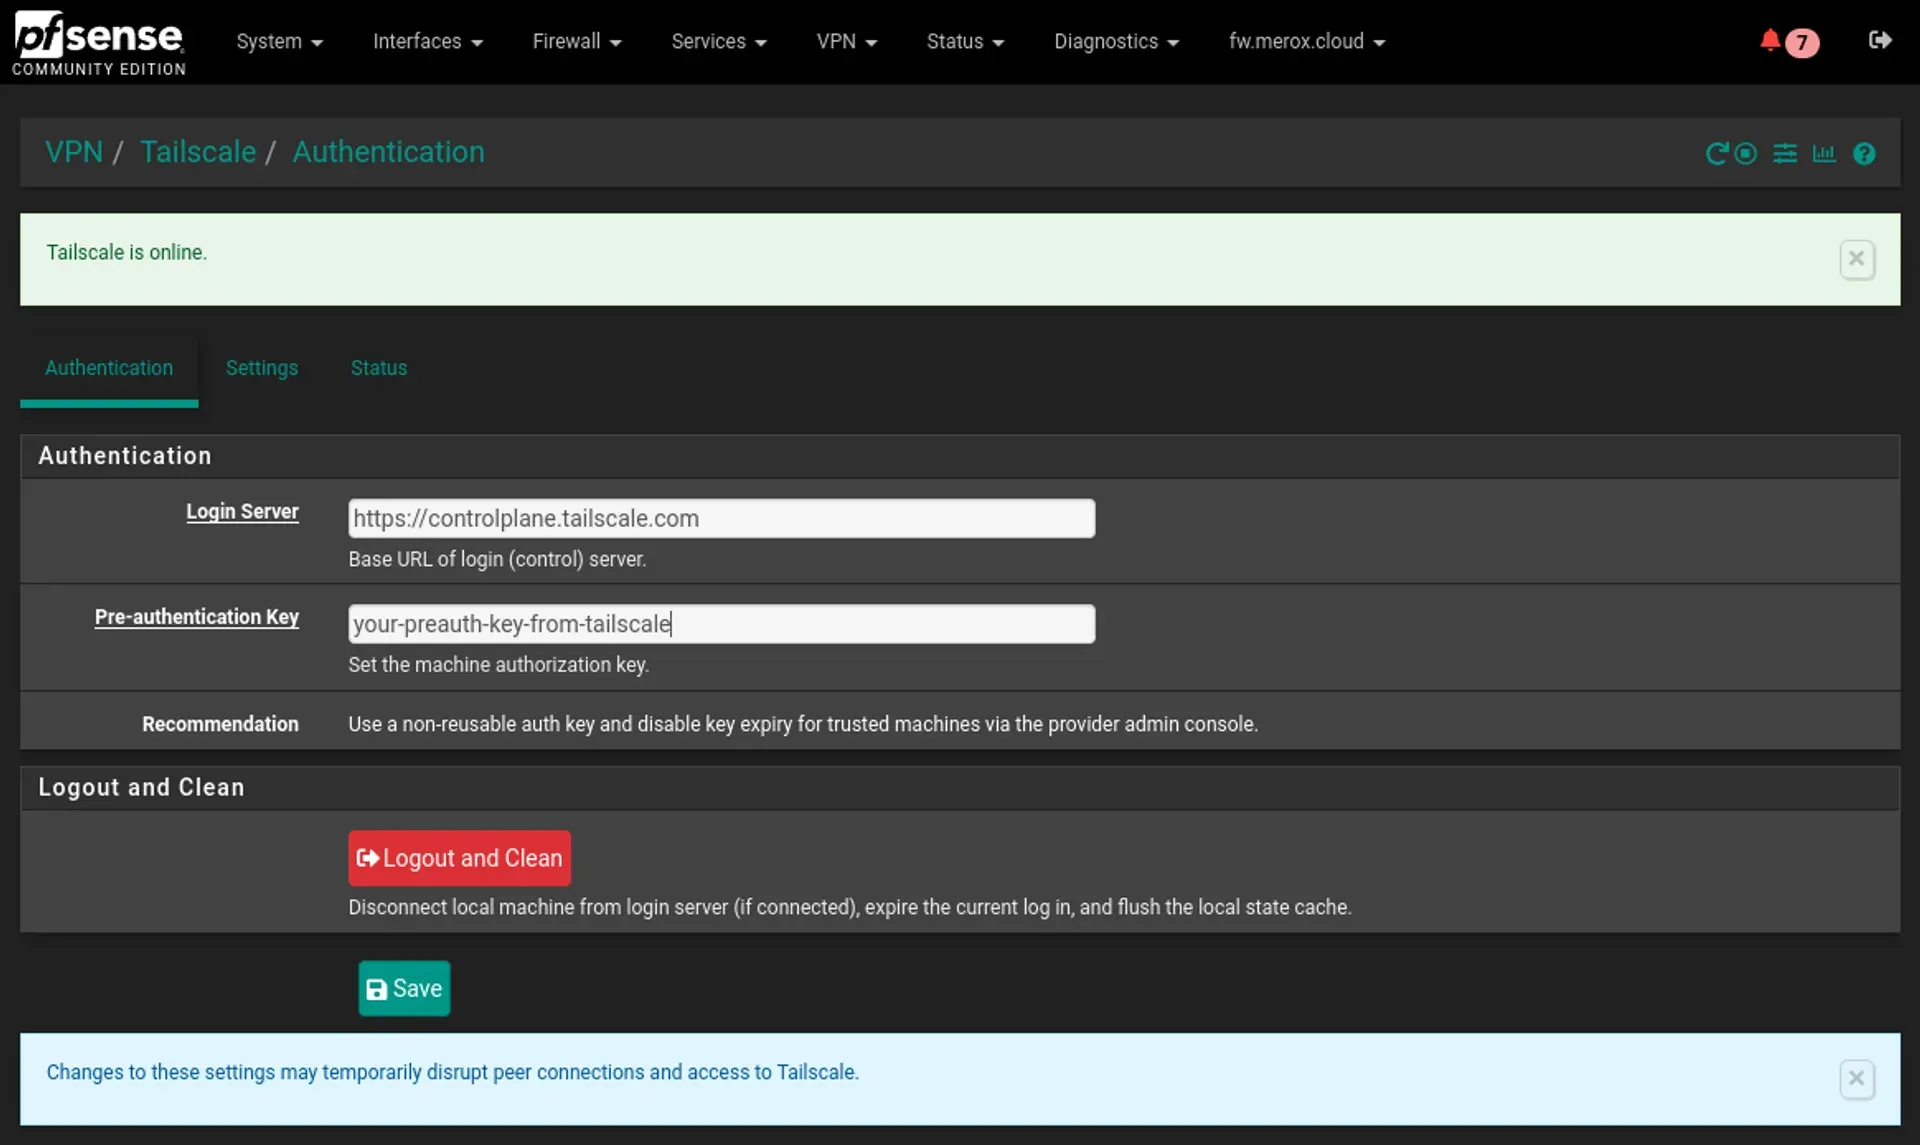
Settings to apply:
- Enable Tailscale ✅
- Listen port: leave default
- Accept Subnet Routes ✅
- Advertise Exit Node ✅ (optional)
- Advertised Routes:
10.57.57.0/24
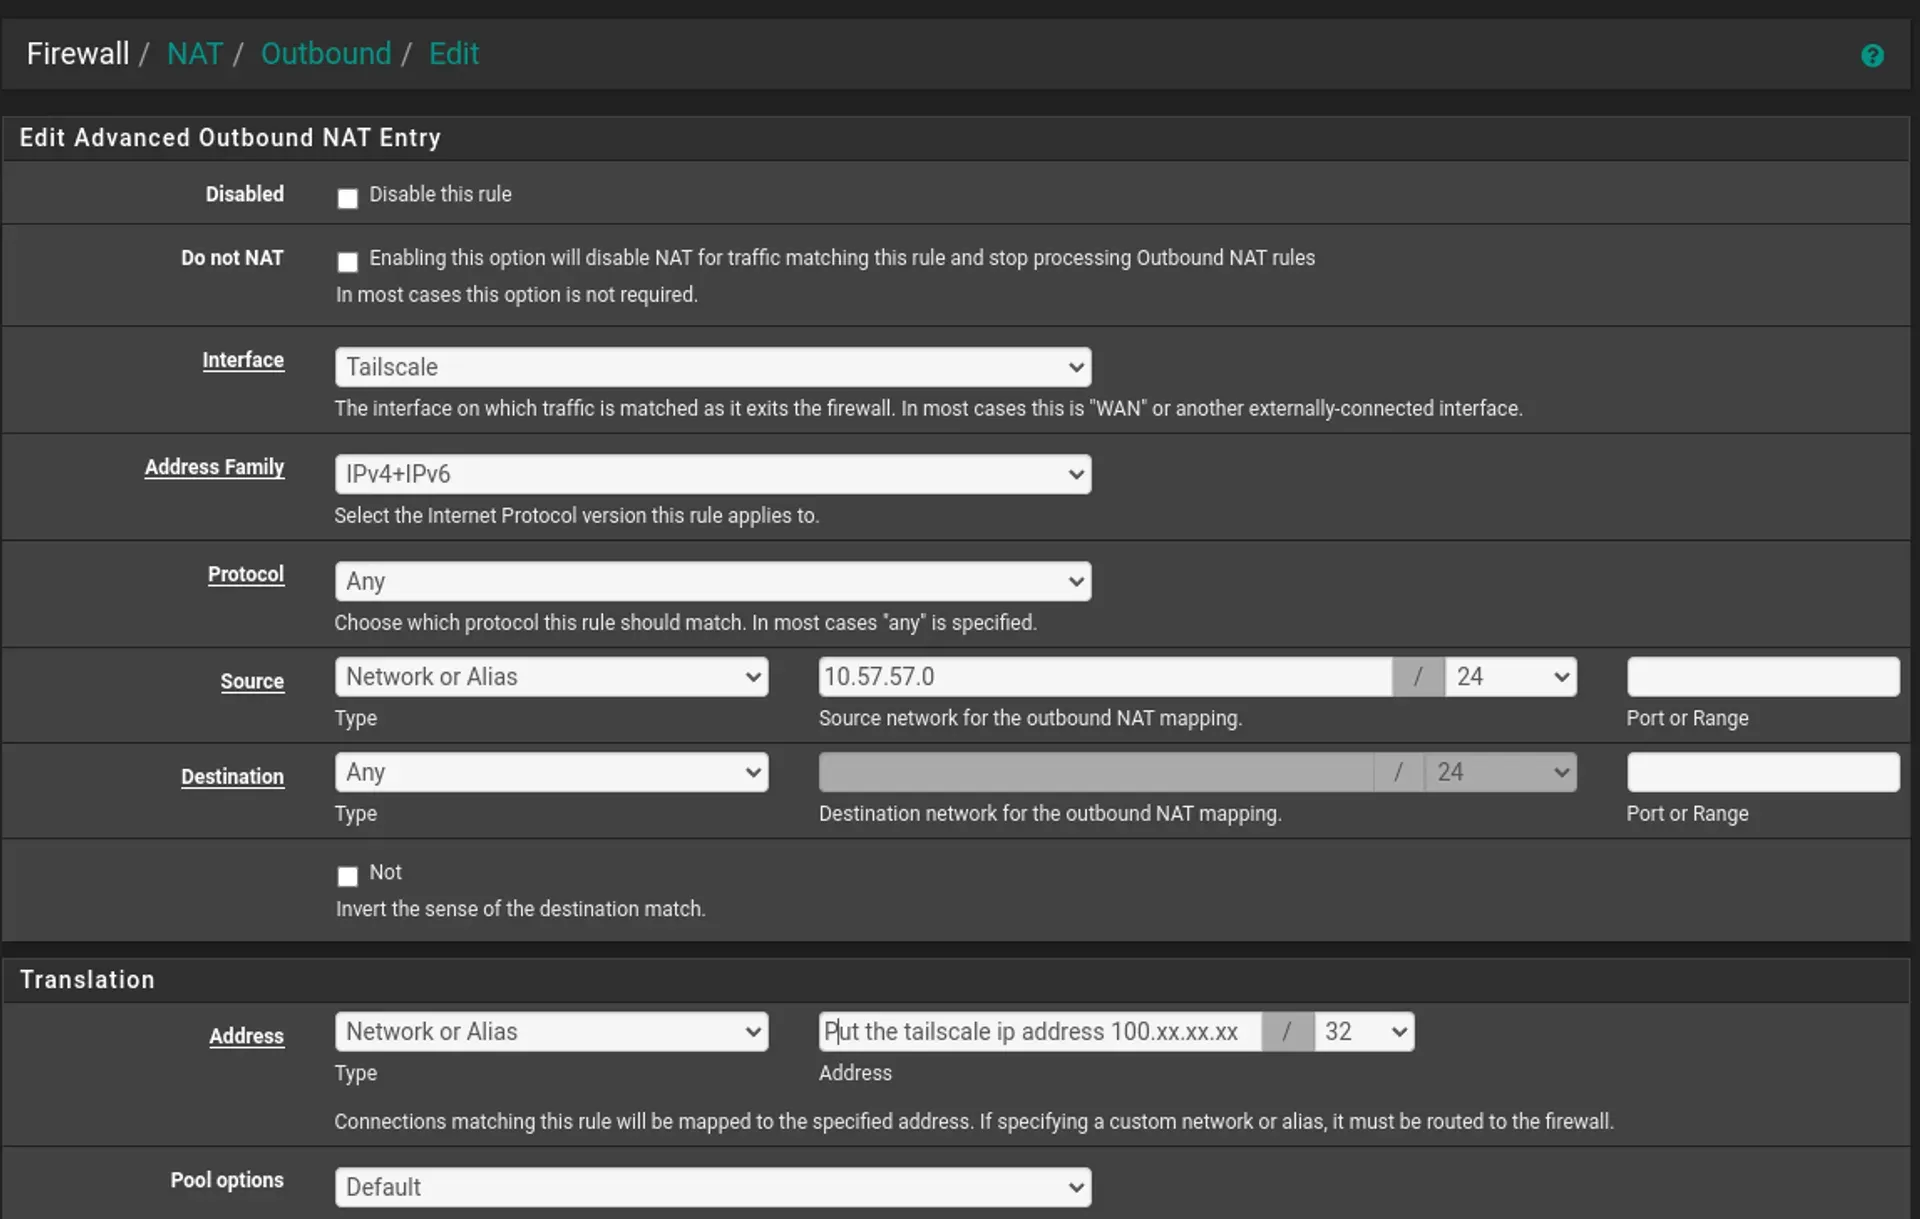
Outbound NAT Rules
Navigate to Firewall > NAT > Outbound and set the mode to Hybrid Outbound NAT, then create a manual mapping:
- Interface: Tailscale
- Address Family: IPv4+IPv6
- Protocol: Any
- Source: 10.57.57.0/24
- Destination: Any
Warning
As of pfSense 23.09.1, the NAT Alias field is broken — it’s missing from the UI. Workaround: under Translation, set Address to “Network or Alias” and enter your Tailscale IP directly as 100.xx.xx.xx/32.
Linux VM Setup (Subnet 2)
Install Tailscale and Enable IP Forwarding
# Install tailscalecurl -sSL https://tailscale.com/install.sh | sh
# Activate routing for IPv4echo 'net.ipv4.ip_forward = 1' | sudo tee -a /etc/sysctl.conf
# Activate routing for IPv6echo 'net.ipv6.conf.all.forwarding = 1' | sudo tee -a /etc/sysctl.conf
# Apply routing configuration at kernel levelsudo sysctl -p /etc/sysctl.conf
Advertise Routes
On the 192.168.57.254 device:
tailscale up --advertise-routes=192.168.57.0/24 --snat-subnet-routes=false --accept-routesWhat each flag does: --advertise-routes exposes the subnet to the rest of your Tailscale network. --snat-subnet-routes=false disables source NAT so the destination machine sees the actual LAN IP of the originating host rather than the subnet router — this is required for routing across multiple networks. --accept-routes tells this node to accept routes advertised by other subnet routers, including the pfSense side.
Approve Routes in the Admin Console
Note
Skip this if you’re using autoApprovers.
Open the Machines page in the Tailscale admin console. Find your subnet routers (look for the Subnets badge or filter by property:subnet), click the ellipsis menu on each, select Edit route settings, and approve the advertised routes.
Credits
- Tailscale Documentation
- Christian McDonald — pfSense Tailscale setup walkthrough