How to Set Up Your Own AI at Home
Running Ollama, OpenWebUI, and Stable Diffusion on a CPU-only homelab server — installation, configuration, and integration.
I wanted to see what my R720 could do with AI workloads — no GPU, just dual 6-core Xeons and 192GB of RAM. I ended up running three tools: Ollama for LLM inference, Stable Diffusion for image generation, and OpenWebUI to tie them together into a single interface. Here’s how I set it all up.
Ollama
I ran this on an Ubuntu 22.04 VM in Proxmox, allocated 20 cores and 64GB of RAM.
Install
curl -fsSL https://ollama.com/install.sh | shPull and Run Llama3
ollama pull llama3ollama run llama3That’s it — you’ll drop into an interactive CLI session. As a sanity check I asked it something from Interstellar:
Note
Question: How does the concept of time dilation in Interstellar relate to Einstein’s theory of relativity?
Tip
Answer: The concept of time dilation in Interstellar is directly related to Albert Einstein’s theory of special relativity, specifically the concept of time dilation. Here’s how: In the movie, a wormhole allows Cooper’s spaceship to travel at incredibly high speeds, approaching relativistic velocities. As they approach the speed of light (0.99c), time appears to slow down for them relative to Earth. This is precisely what Einstein predicted in his theory…
Stable Diffusion
Setup follows the AUTOMATIC1111 WebUI repo.
Install Dependencies
Debian/Ubuntu:
sudo apt install wget git python3 python3-venv libgl1 libglib2.0-0Red Hat:
sudo dnf install wget git python3 gperftools-libs libglvnd-glxopenSUSE:
sudo zypper install wget git python3 libtcmalloc4 libglvndDownload and Run
wget -q https://raw.githubusercontent.com/AUTOMATIC1111/stable-diffusion-webui/master/webui.sh./webui.shCPU-Only Configuration
Since I have no GPU, I added the following to webui-user.sh:
export COMMANDLINE_ARGS="--lowvram --precision full --no-half --skip-torch-cuda-test"--lowvram reduces memory pressure, --precision full and --no-half avoid half-precision issues on CPU, and --skip-torch-cuda-test skips CUDA checks that would fail anyway.
Expose on Network
By default it binds to localhost. To make it reachable by OpenWebUI:
./webui.sh --listenThis binds to 0.0.0.0:7860.

OpenWebUI
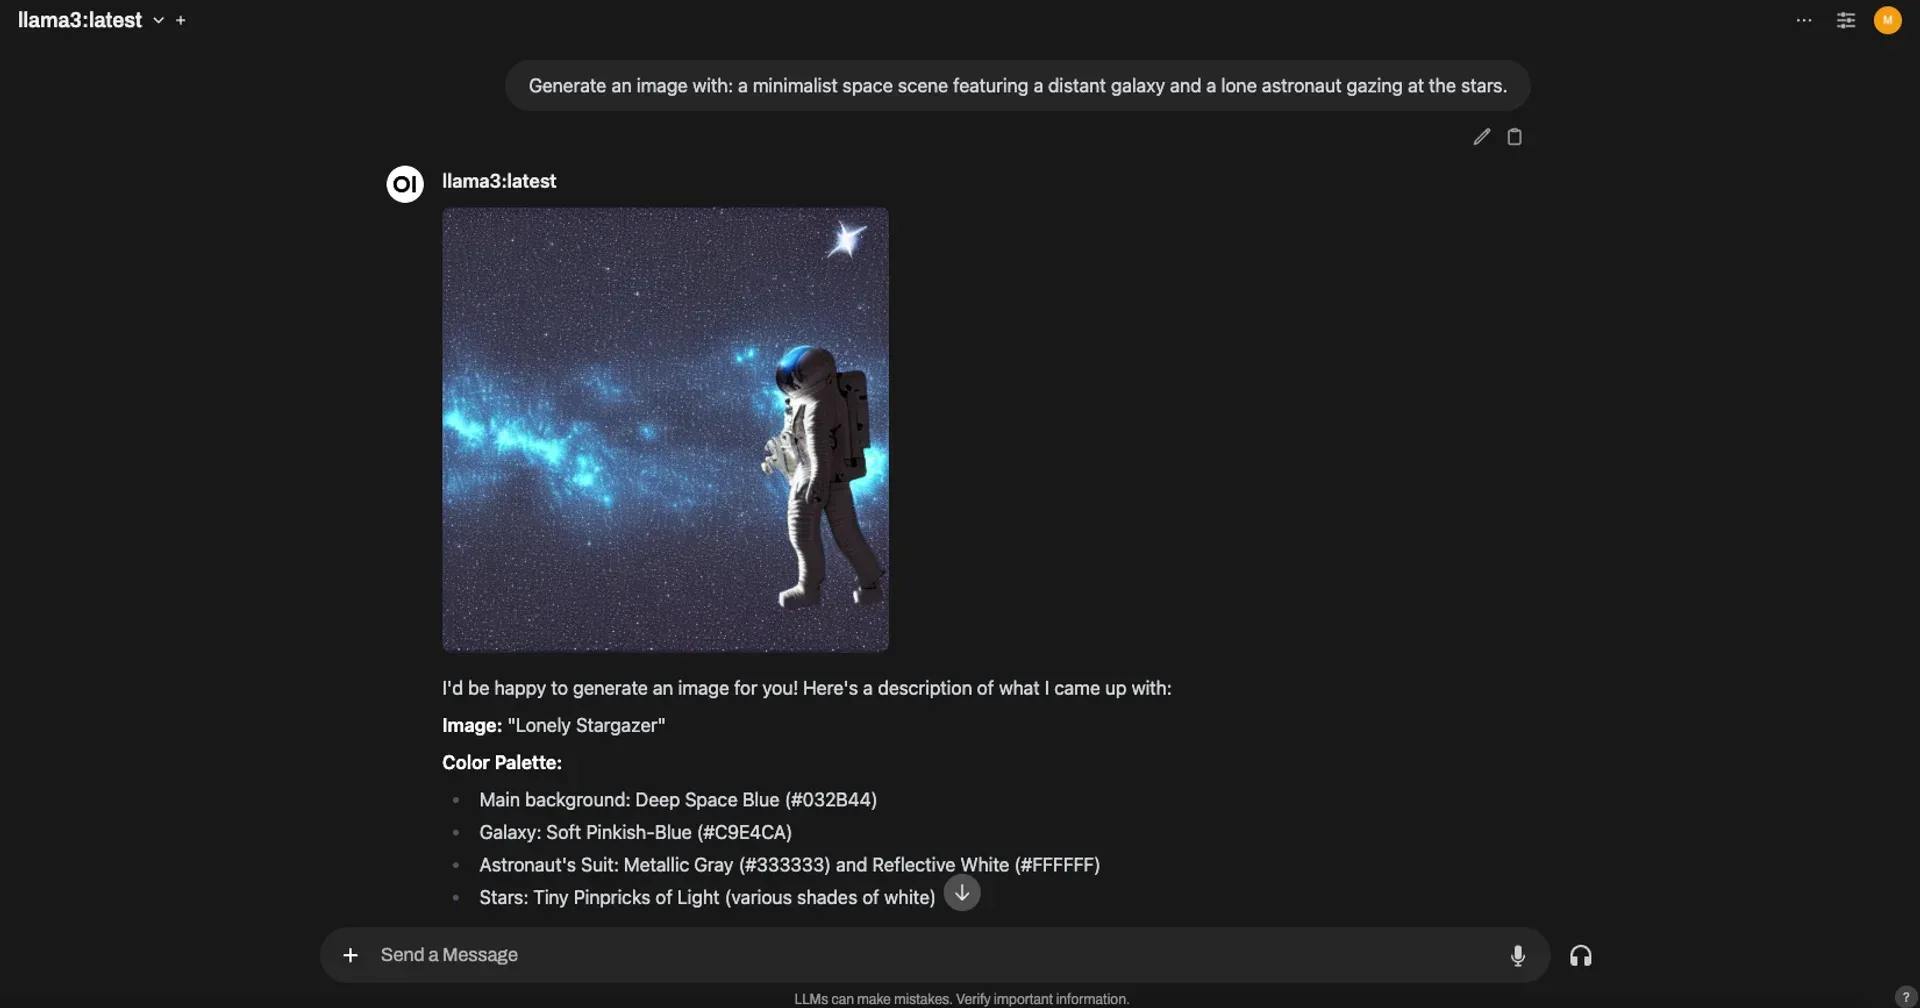
OpenWebUI gives you a ChatGPT-style interface on top of Ollama and Stable Diffusion. Easiest part of the whole setup.
Install with Docker
Ollama on the same host:
docker run -d -p 3000:8080 --add-host=host.docker.internal:host-gateway \ -v open-webui:/app/backend/data --name open-webui --restart always \ ghcr.io/open-webui/open-webui:mainOllama on a different server:
docker run -d -p 3000:8080 -e OLLAMA_BASE_URL=https://example.com \ -v open-webui:/app/backend/data --name open-webui --restart always \ ghcr.io/open-webui/open-webui:mainWith Nvidia GPU:
docker run -d -p 3000:8080 --gpus all --add-host=host.docker.internal:host-gateway \ -v open-webui:/app/backend/data --name open-webui --restart always \ ghcr.io/open-webui/open-webui:cudaConnect Ollama
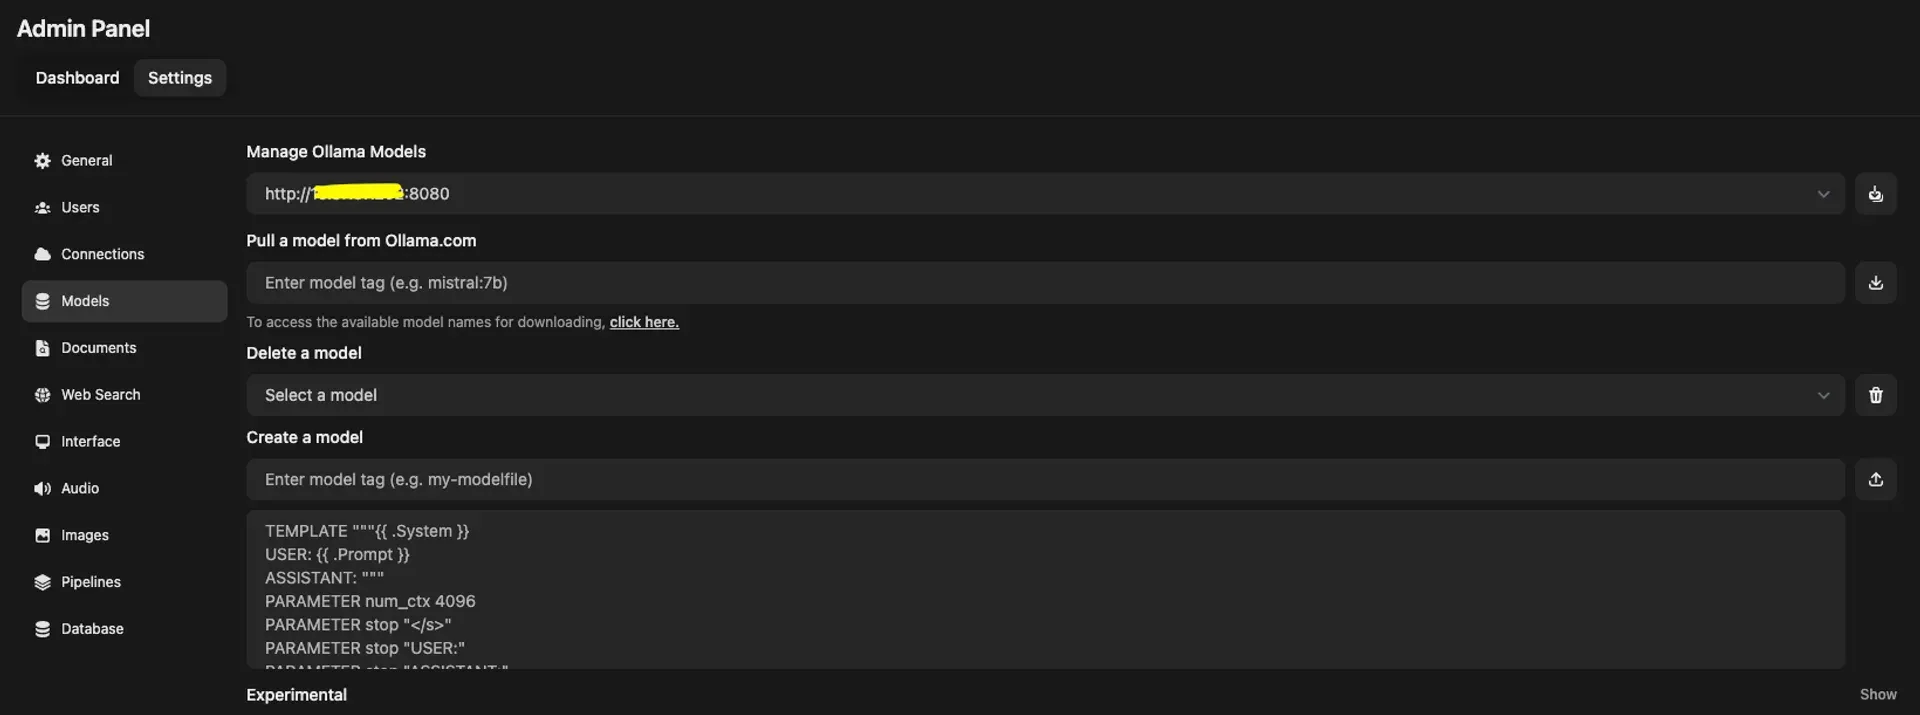
Go to http://ip_server_openwebui:3000/admin/settings/, then Models → Manage Ollama Models and enter your Ollama server URL.
Connect Stable Diffusion
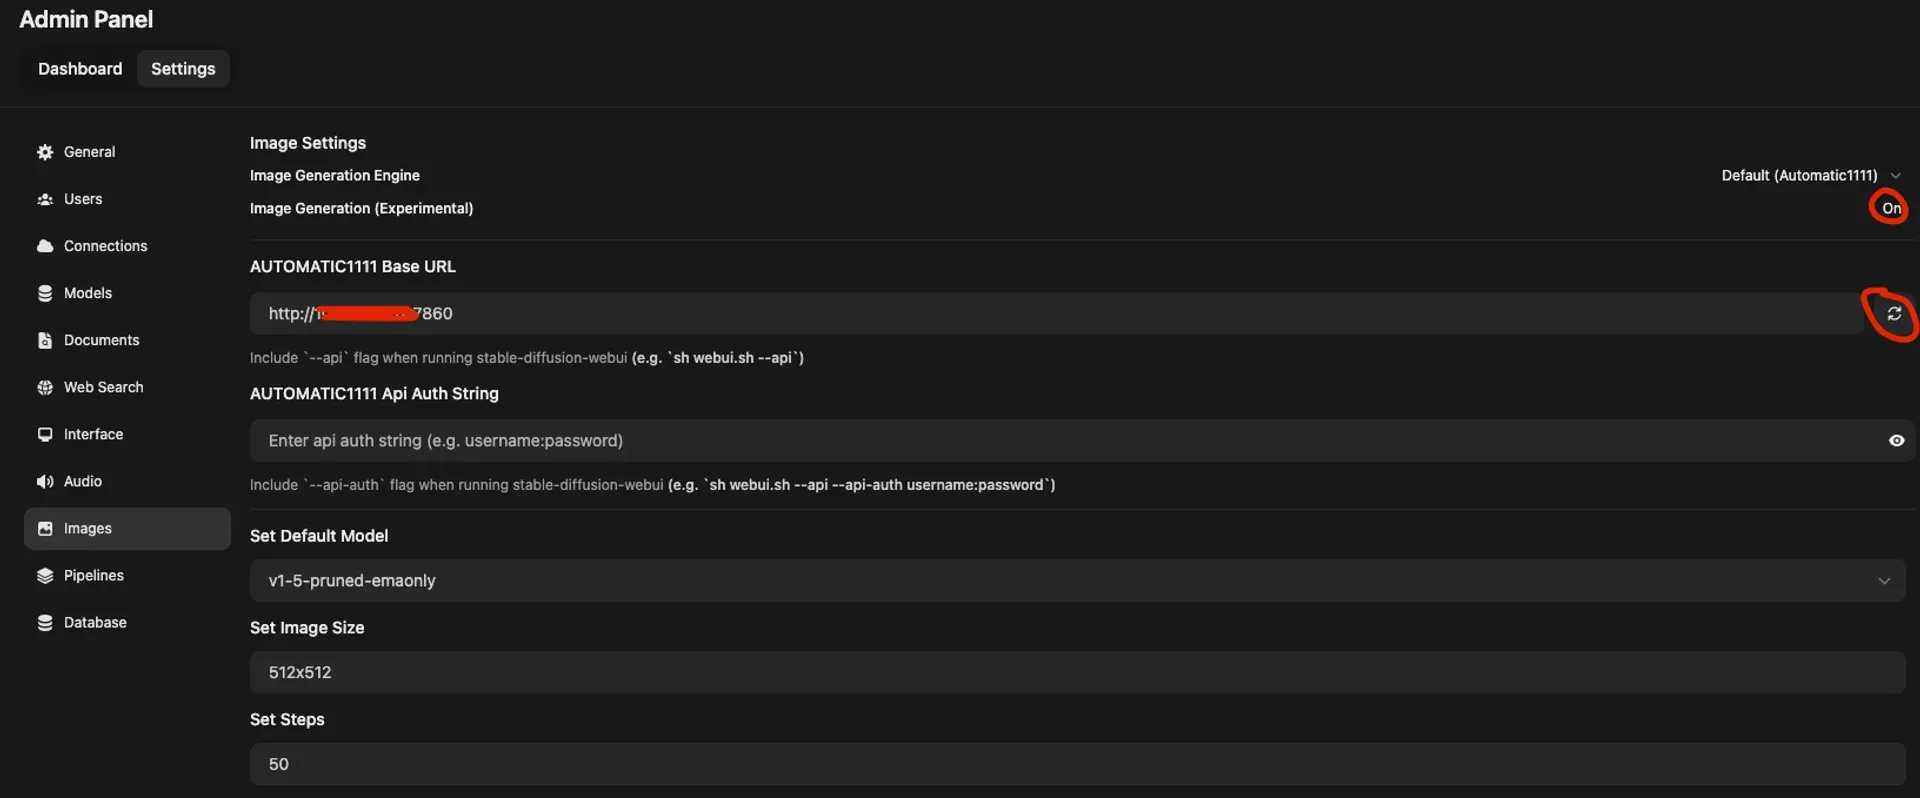
Go to Images, find the AUTOMATIC1111 Base URL field, enter your Stable Diffusion server URL, and hit the refresh button to verify. Save if it checks out. You can then set a default model under Set Default Model.
Performance on CPU-Only
Running LLMs without a GPU is slow. Here’s what the numbers look like with Llama3 on dual Xeon E5-2620 v2s:
| Metric | Value |
|---|---|
| Response Token/s | 0.46 |
| Prompt Token/s | 1.99 |
| Total Duration | 1072376.46 ms (~17 min 52 sec) |
| Load Duration | 61347.1 ms |
| Prompt Eval Count | 33 |
| Prompt Eval Duration | 16571.72 ms |
| Eval Count | 457 |
| Eval Duration | 994411.07 ms |
Functional, but not something you’d want to use interactively. I eventually added an NVIDIA Tesla P40 to the R720 — the full GPU passthrough setup is covered in Proxmox GPU Passthrough Guide.
Credits
- TechnoTim — AI setup tutorial
- Sean Zheng — Running Llama 3 with NVIDIA GPU