From WordPress to Hugo: My Setup Explained
Why I moved from WordPress to Hugo, and how the site runs today — GitHub Actions, GitHub Pages, and Cloudflare.
Note
UPDATE (November 2025): Since writing this post, I’ve migrated from Hugo to Astro with the Erudite theme. The principles here still apply — static sites are still the right call for content-focused websites.
Ten years of WordPress taught me enough to know when to leave. You start tweaking PHP configs, switching to LiteSpeed, juggling plugin updates — and for what? A blog. WordPress makes sense for e-commerce maybe, but for a simple content site it’s just overhead. Every plugin is another attack surface, and the DB adds a bottleneck you don’t need.
The alternative was also just more interesting to run. A git push triggers a build, Cloudflare Pages deploys it globally, everything is version-controlled and auditable. Writing a post is a markdown file in a repo. That’s a more satisfying way to operate a website if you spend your days in a terminal anyway.
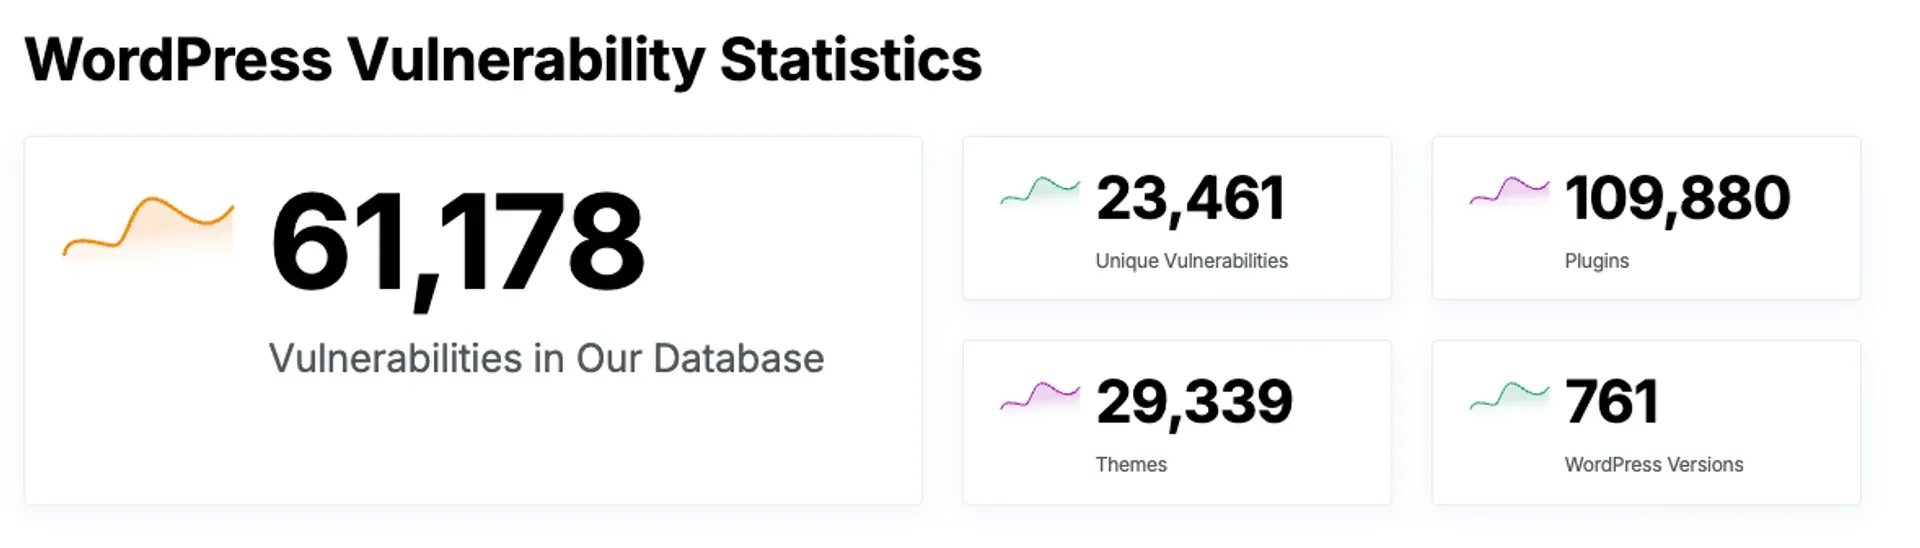
Known vulnerabilities tracked at wpscan.com.
Hugo
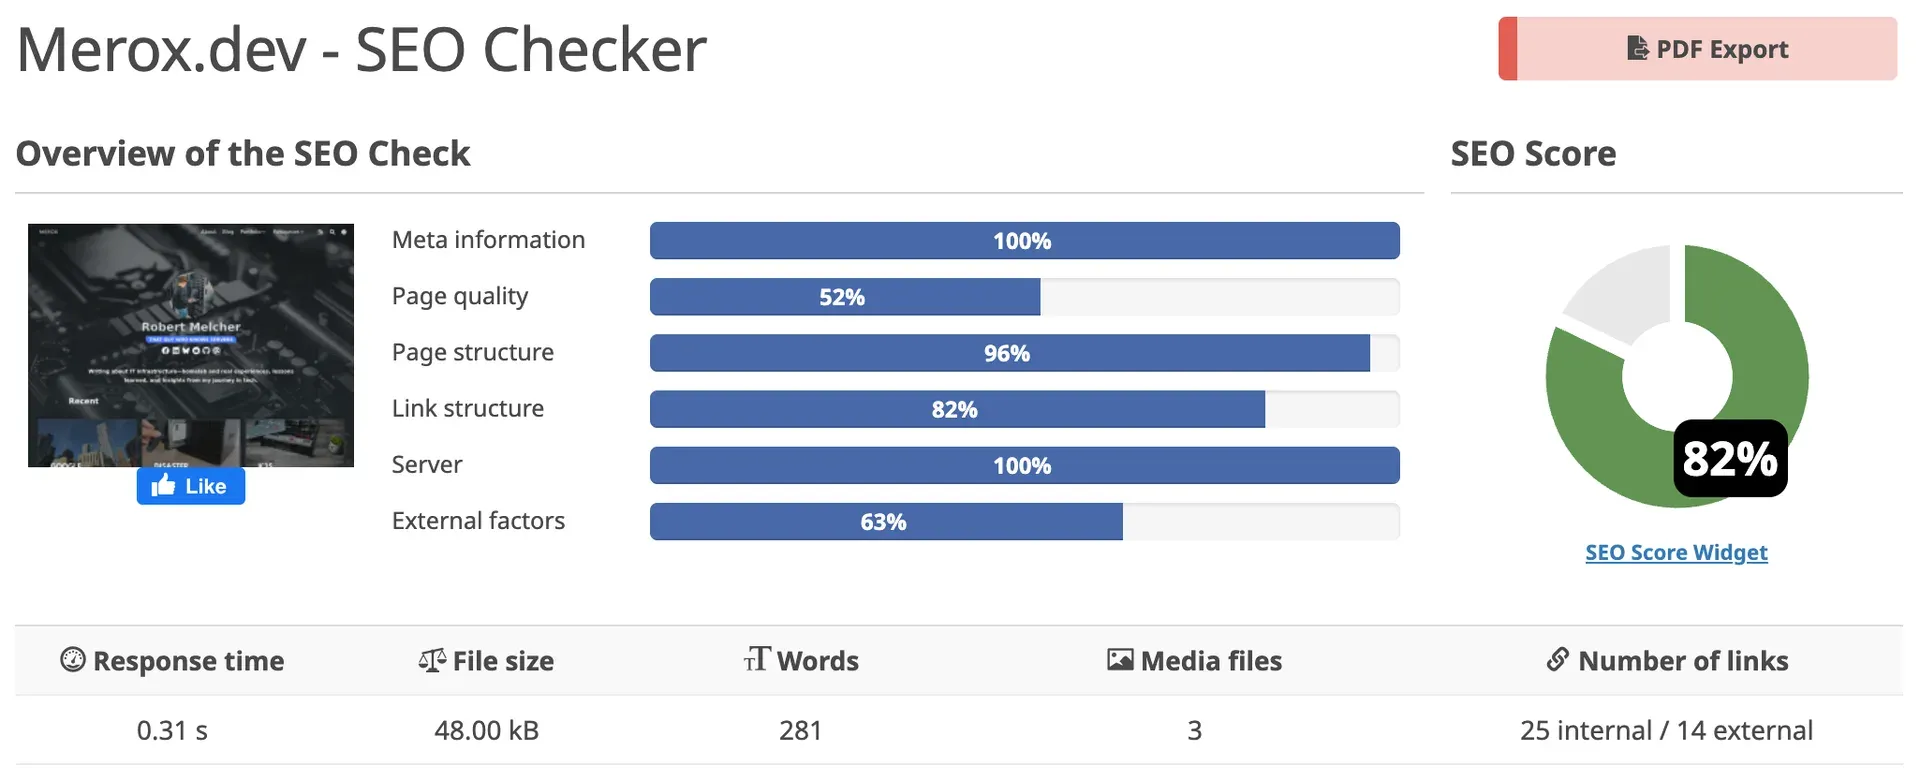
merox.dev has been running on Hugo for over six months. Static files, no backend, free hosting on GitHub Pages, everything version-controlled. Hugo is written in Go so builds are fast, and the output is clean enough that SEO scores came in above 80% without any extra work.
I went with the Blowfish theme. To track upstream updates without breaking my customizations, I forked it and added it as a submodule:
git submodule add https://github.com/YOURUSERNAME/blowfish themes/blowfishThe only real downside to Hugo is that you need to be comfortable in a terminal and working with Markdown. There’s no dashboard.
GitHub Pages + Cloudflare
- Push Hugo project to a private repo
- Enable GitHub Pages on a public repo (branch:
gh-pages, folder:/) - In Cloudflare, add a CNAME for
www.yourdomain.com→yourusername.github.ioand A records for GitHub Pages IPs if needed - Add a
CNAMEfile to your repo:
merox.devAutomated Deploys with GitHub Actions
My workflow: edit in VS Code → push to private repo → GitHub Actions builds and deploys to the public repo.
Private → Public Deploy via RSA
Since I keep the source in a private repo, I wire the two together with an SSH deploy key:
- Generate the key pair:
ssh-keygen -t rsa -b 4096 -C "github-deploy" -f deploy_key -N ""-
Public repo: Settings → Deploy Keys → add
deploy_key.pubwith write access -
Private repo: Settings → Secrets → add
PRIVATE_KEYwith the private key contents -
.github/workflows/deploy.yml:
name: github pages
on: push: branches: - master
permissions: contents: write id-token: write
jobs: deploy: runs-on: ubuntu-22.04 steps: - uses: actions/checkout@v4 with: submodules: true fetch-depth: 0
- name: Setup Hugo uses: peaceiris/actions-hugo@v3 with: hugo-version: 'latest' extended: true
- name: Build run: hugo --minify
- name: Deploy uses: peaceiris/actions-gh-pages@v3 with: deploy_key: ${{ secrets.PRIVATE_KEY }} external_repository: meroxdotdev/merox.dev publish_branch: gh-pages publish_dir: ./public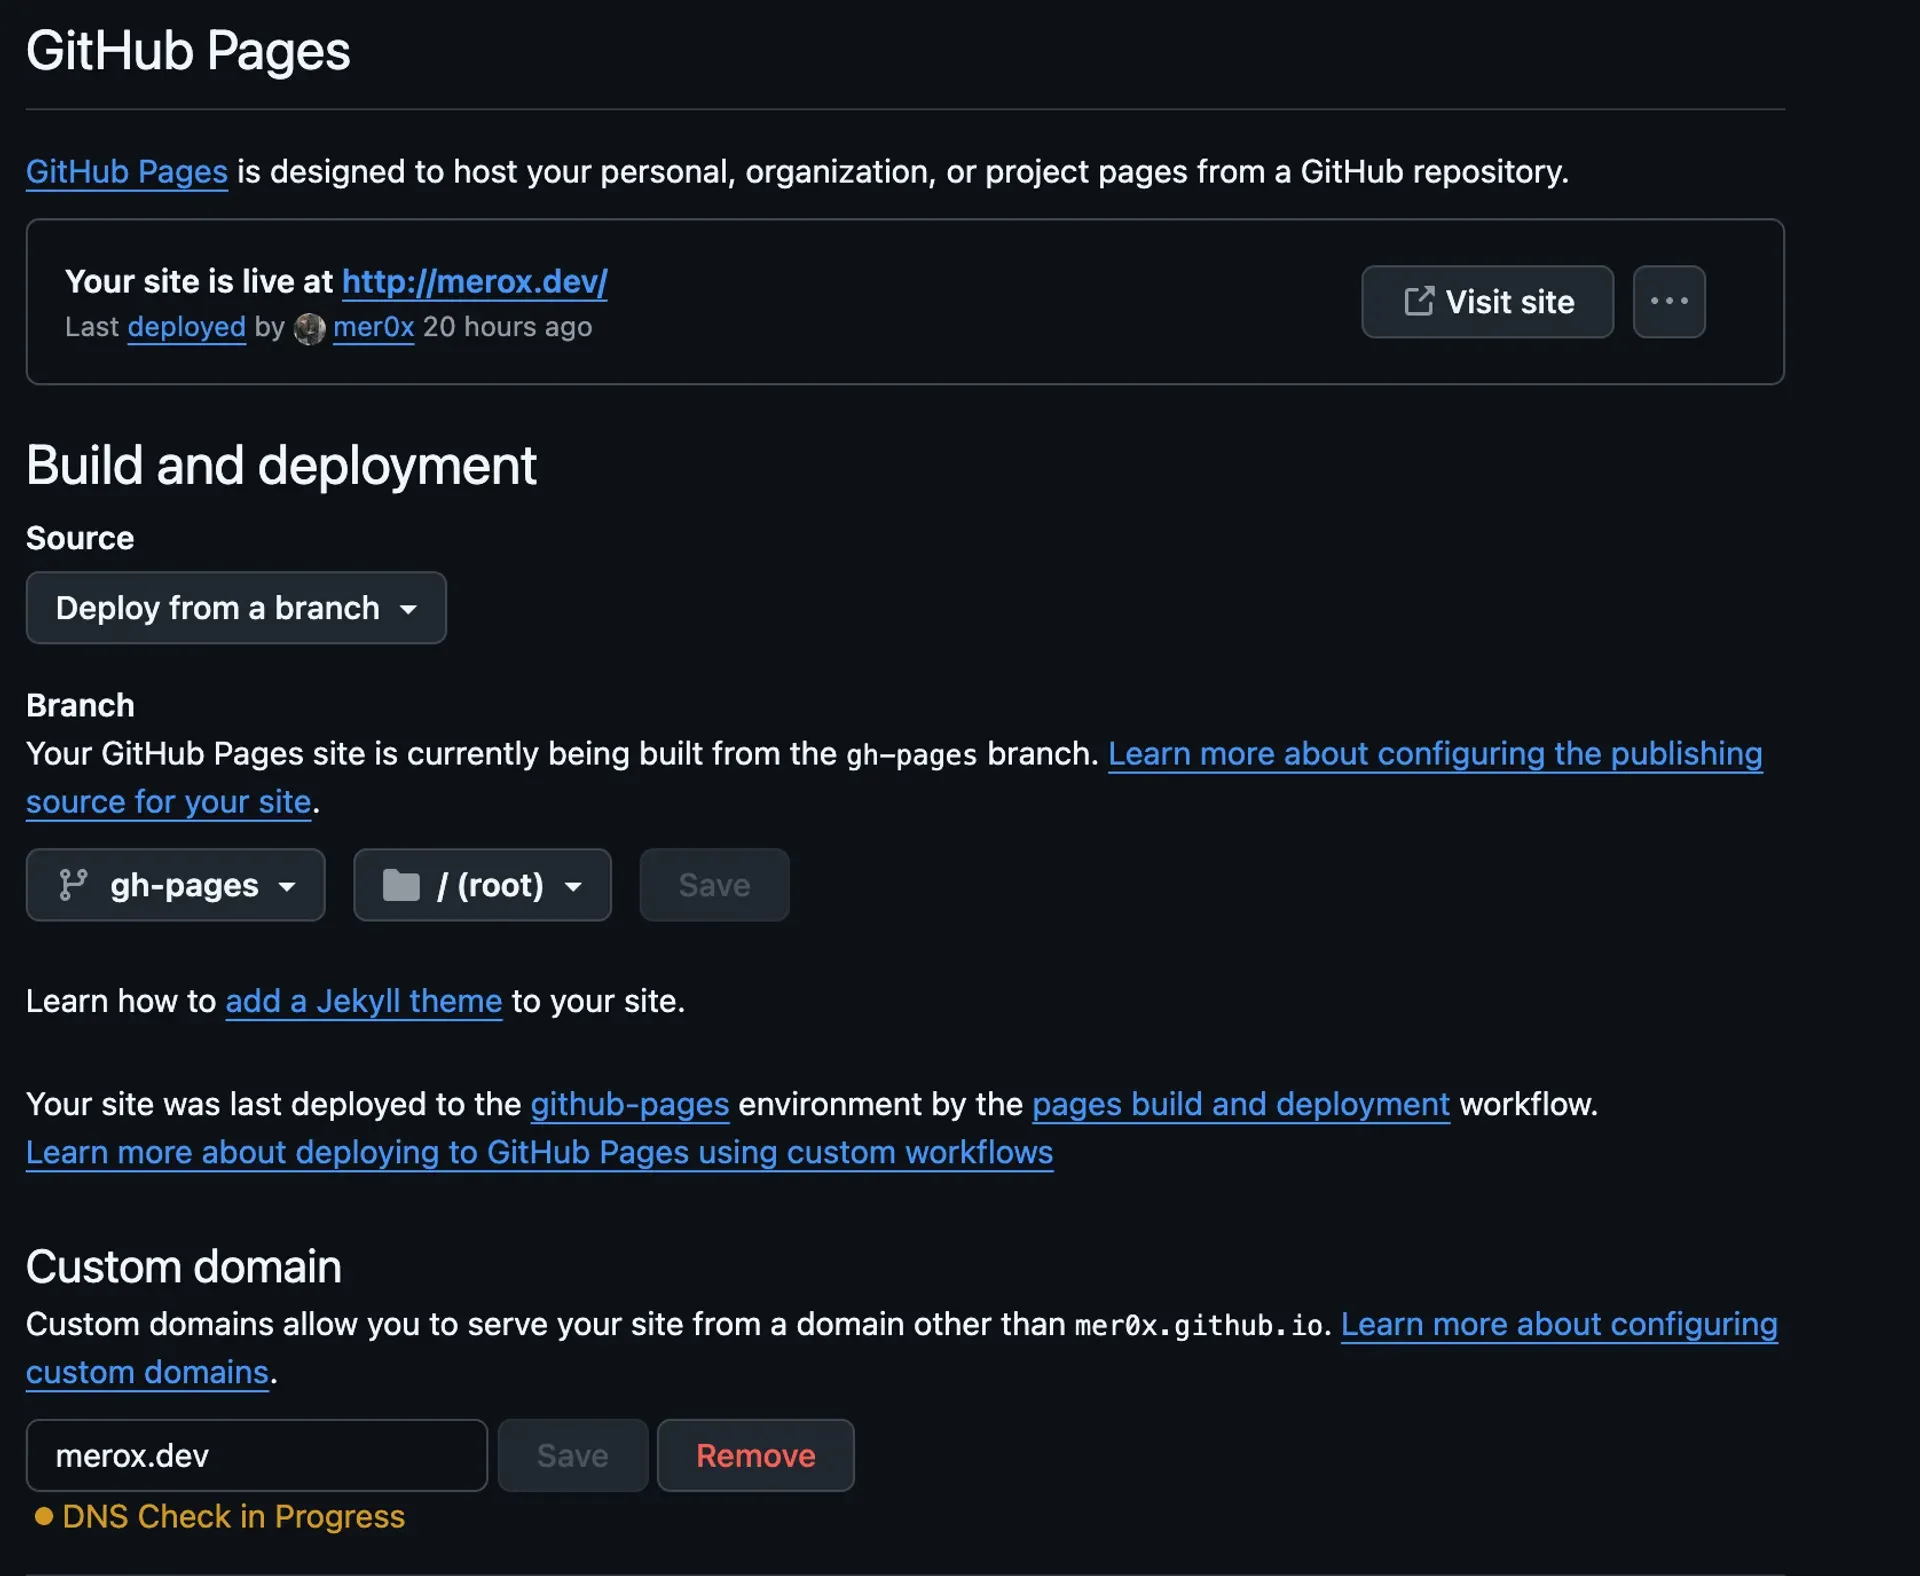

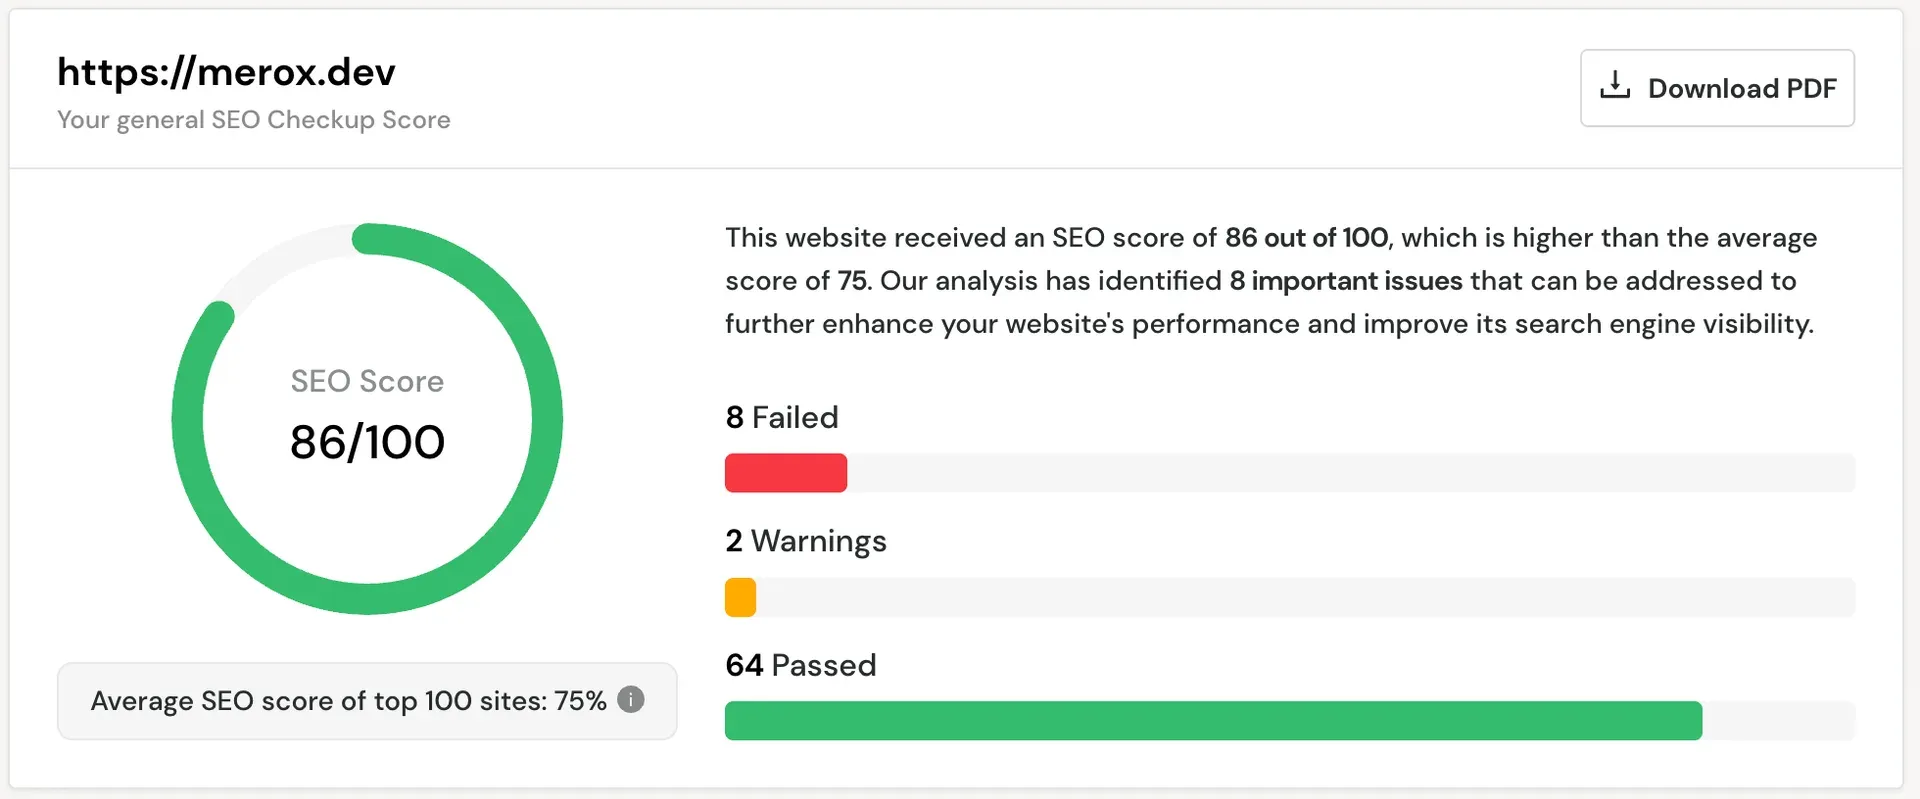
SEO Results
No extra configuration — Hugo’s clean output just scores well out of the box.