Homelab as Code: Packer + Terraform + Ansible
Automate your homelab from scratch — VM templating with Packer, provisioning with Terraform, and service deployment with Ansible on Proxmox.
Warning
Archived. The GitHub repo is archived and no longer maintained. Infrastructure has moved to Talos + FluxCD GitOps. Keeping this post up as a reference for the Packer + Terraform + Ansible approach on Proxmox.
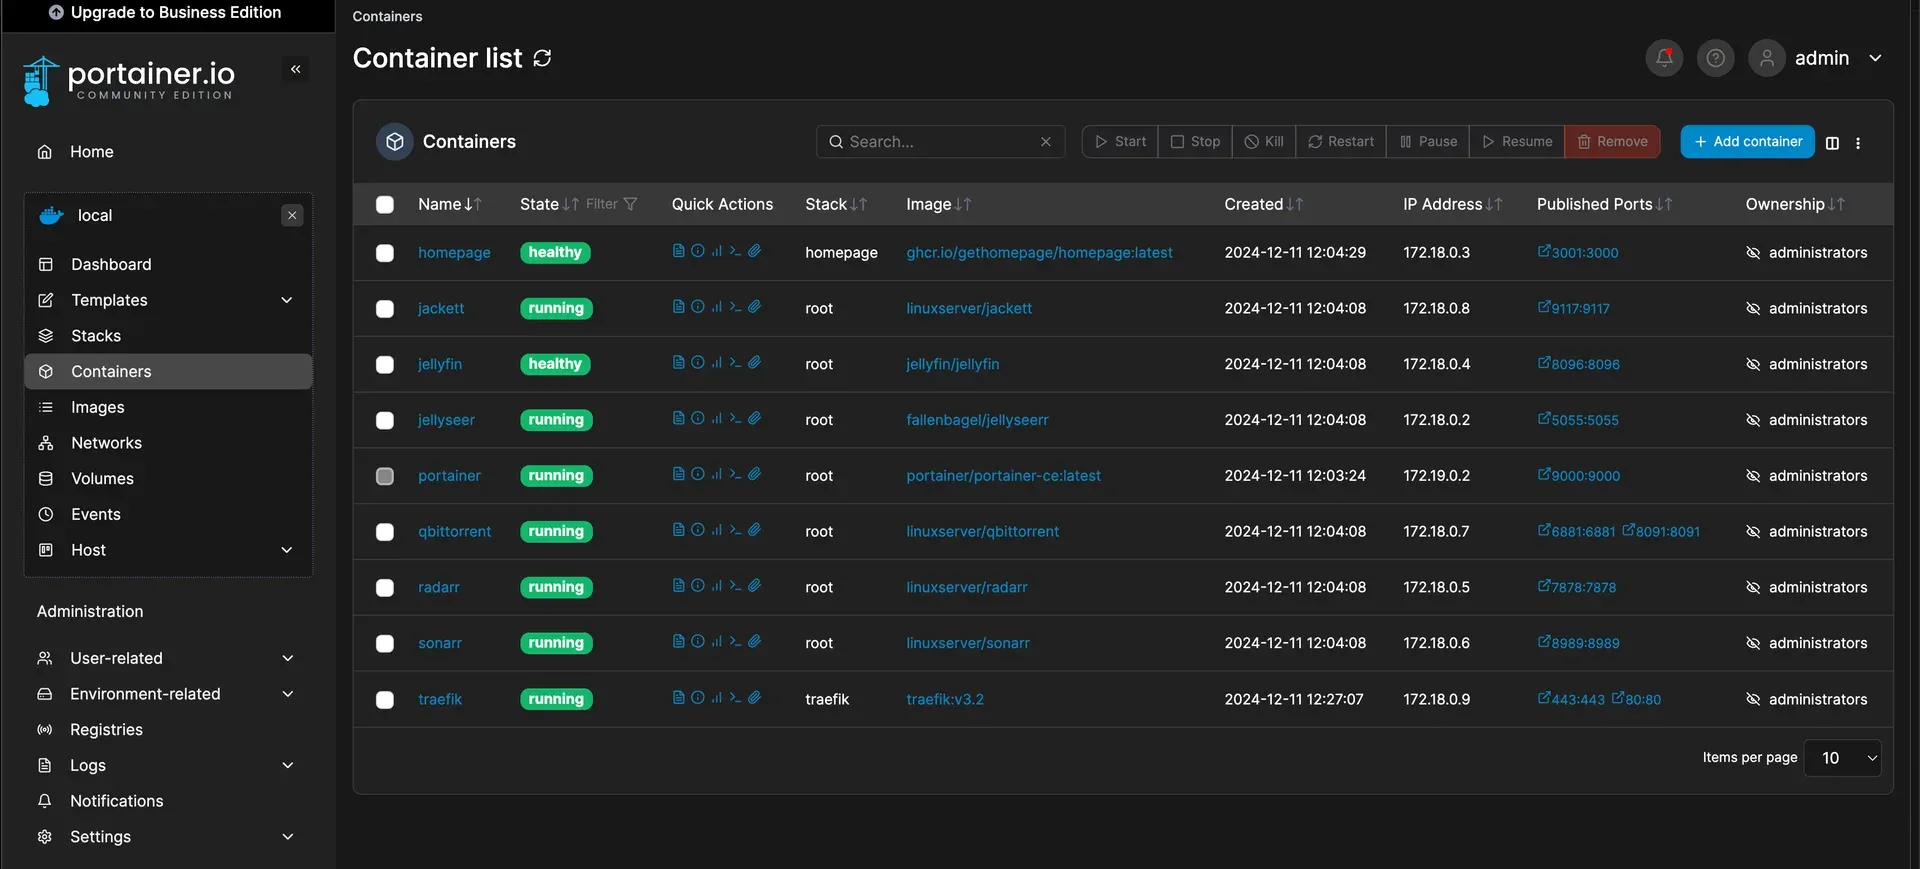
This project automates a full homelab deployment — Packer builds the VM template, Terraform provisions it on Proxmox, and Ansible handles everything inside: Docker, Portainer, Traefik, and optional services like a media stack and Homepage dashboard.
Requirements
Note
This project deploys an Ubuntu VM with Docker, Portainer, Media Stack, Traefik, and more. You’ll need:
- Proxmox VE for VM management
- A fresh LXC to run the deploy script
- A DNS server configured for your service domains
Architecture and Source Code

Source: meroxdotdev/homelab-as-code
What’s in the Repository
The repo covers everything needed to go from zero to a running VM with services:
- Deploy script — installs dependencies (
git,curl,ansible,packer,terraform), clones the repo, and runs the full pipeline ansible/— roles for Docker, Portainer, Traefik, and optional NFS mountsconfigs/docker/— pre-configured services: Homepage, Traefik, media stackpacker/— builds an optimized Ubuntu template for Proxmoxterraform/— VM provisioning with networking and storage, based on the Packer template
Quick Start
Run this on a clean LXC:
bash -c "$(curl -fsSL https://raw.githubusercontent.com/meroxdotdev/homelab-as-code/refs/heads/master/deploy_homelab.sh)"What the Script Does
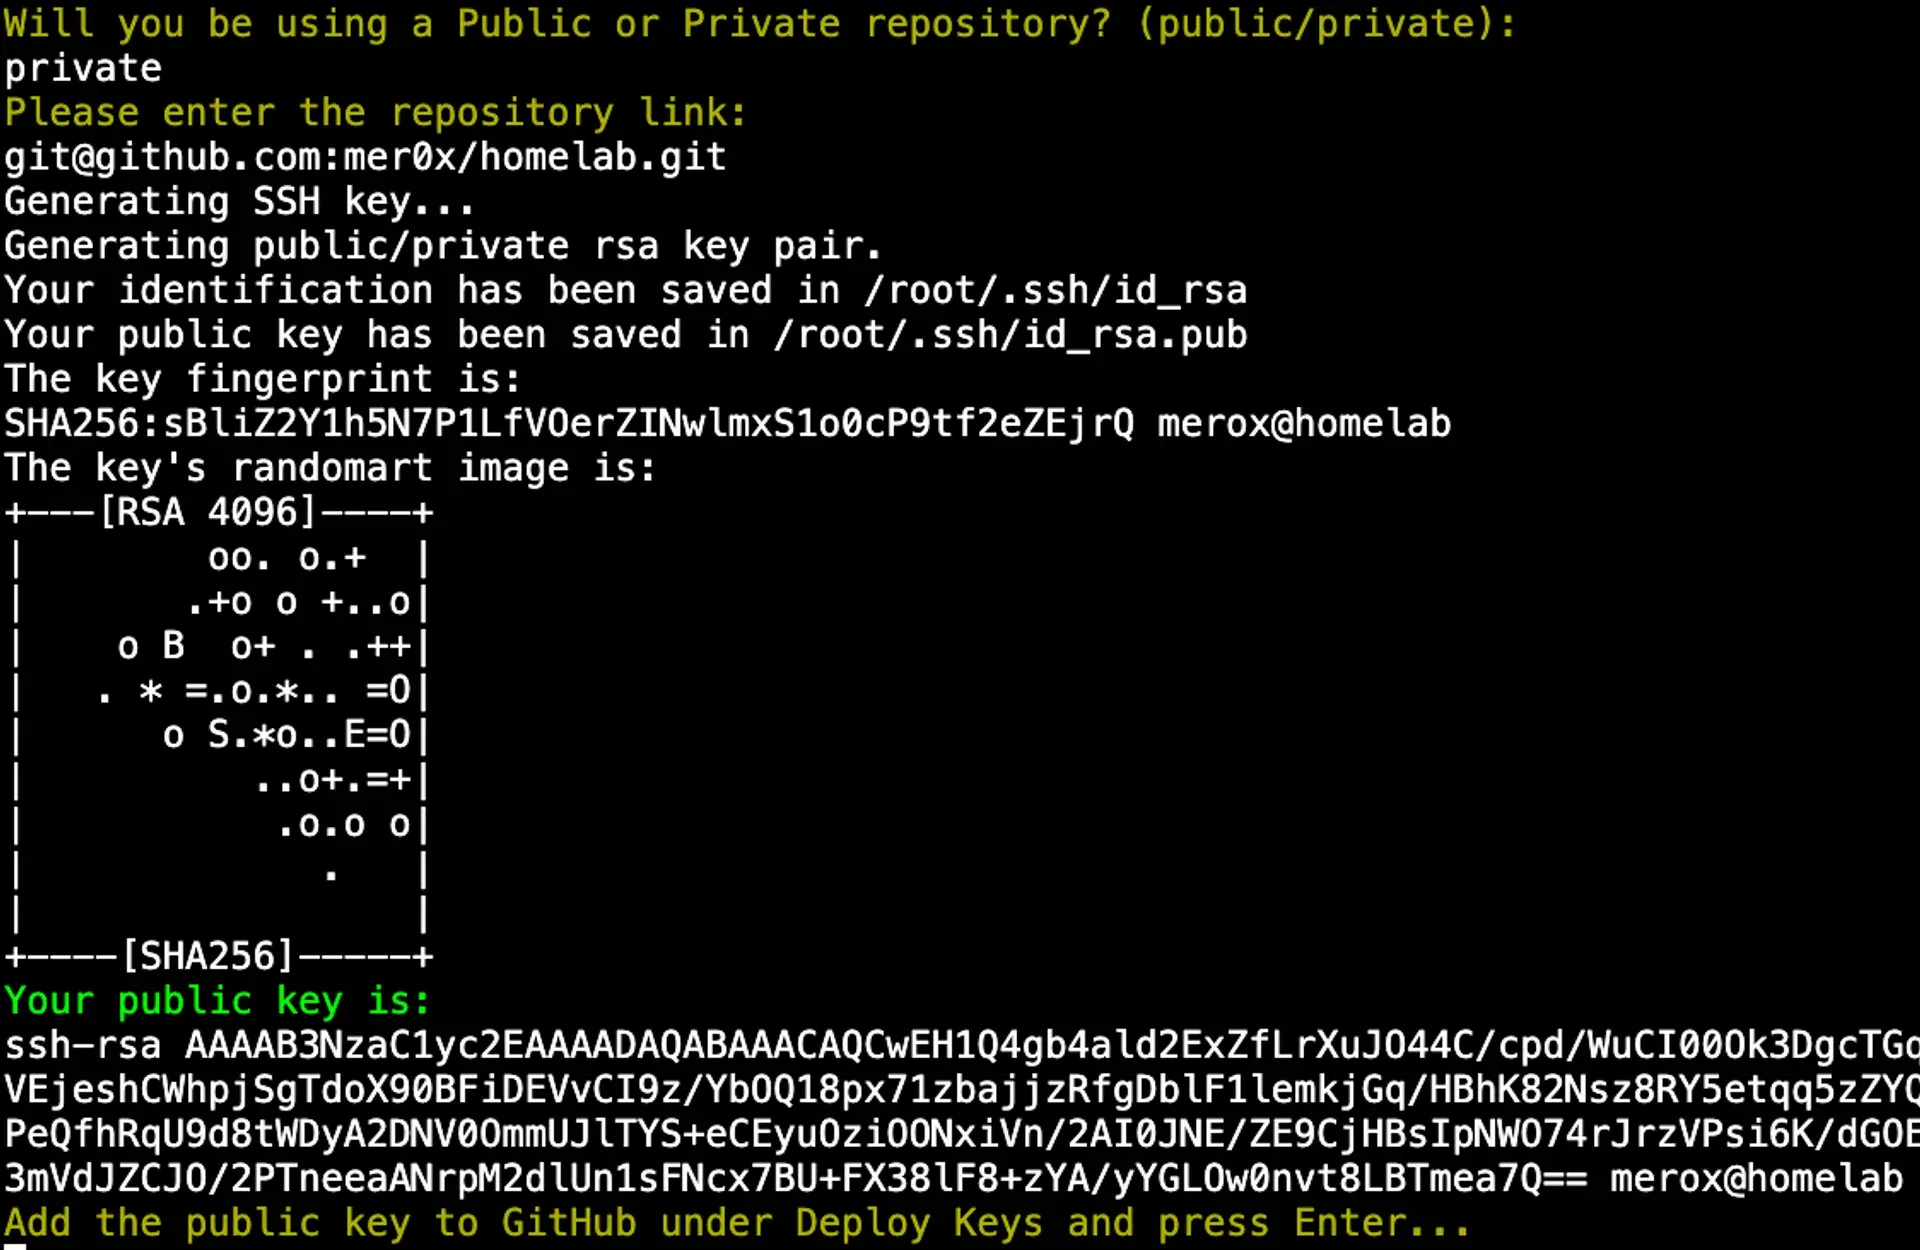
The script first asks whether your repository is public or private. For private repos, it generates an SSH key and prompts you to add it as a deploy key in your repo settings. For the public tutorial repo, use https://github.com/meroxdotdev/homelab-as-code.git directly.

Next, it asks whether you’ve already edited the required config files. Type yes to proceed with the Packer → Terraform → Ansible pipeline, or no to exit and review the guides below first.
Downloaded config files land in /home/homelab/.
Configuration Guides
The setup is split across four subposts — go through them in order before running the script:
- Ansible Setup — inventory, roles, optional NFS mounts
- Services Configuration — Homepage, Media Stack, Traefik
- Infrastructure Setup — Packer and Terraform
- Deployment & Verification — final steps and checks