Synology HyperBackup to Oracle Cloud
How to configure Synology HyperBackup with Oracle Cloud's Always Free Ampere instance using rsync over Tailscale — including the SSH override that breaks most setups.
I was already running the Oracle Cloud Always Free instance as a VPS — the 200GB of block storage that comes with it was sitting there unused, so pointing HyperBackup at it as an off-site backup target made sense. Getting it to work with rsync over SSH has one non-obvious blocker: Oracle Cloud uses SSH config includes that override your main sshd_config, and HyperBackup needs password auth for initial setup.
Note
This guide assumes you already have an Oracle Cloud Always Free instance running Ubuntu and Tailscale configured. If you’re new to Tailscale, their homelab docs are a good starting point.
Ubuntu Server Setup
Install Packages and Create Backup User
sudo apt updatesudo apt install rsync openssh-server -ysudo systemctl enable sshsudo systemctl start ssh
sudo useradd -m -s /bin/bash synology-backupsudo passwd synology-backup
sudo mkdir -p /backup/synologysudo chown synology-backup:synology-backup /backup/synologysudo chmod 750 /backup/synology
df -h /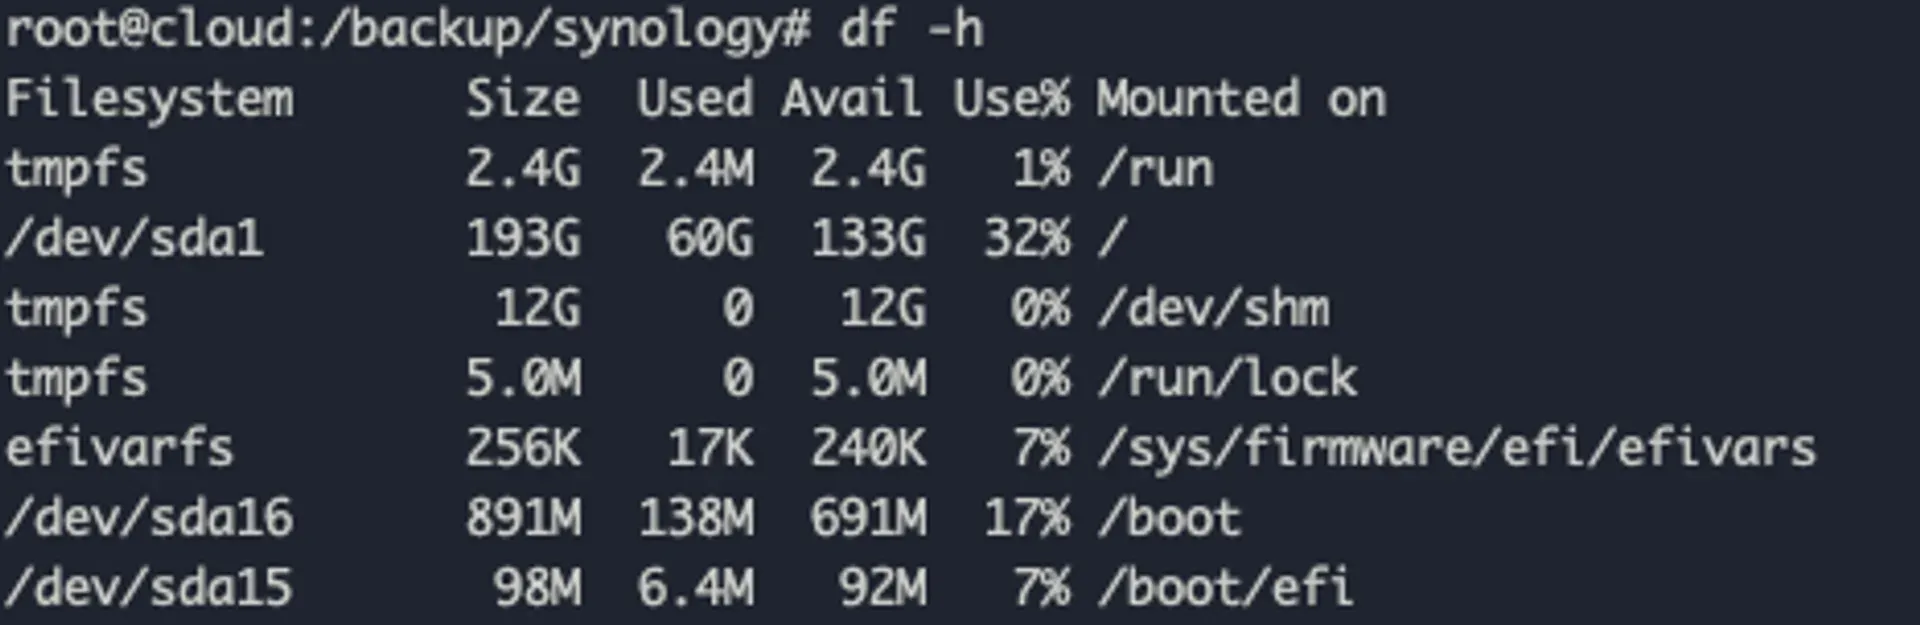
Fix Oracle Cloud SSH Configuration
This is the part most guides miss. Oracle Cloud places an override file in /etc/ssh/sshd_config.d/ that disables password auth regardless of what you set in the main config. Without fixing this, you’ll get:
synology-backup@100.72.22.38: Permission denied (publickey).Check for override files:
ls -la /etc/ssh/sshd_config.d/sudo nano /etc/ssh/sshd_config.d/50-cloud-init.confChange:
PasswordAuthentication noto:
PasswordAuthentication yesAlso verify /etc/ssh/sshd_config has:
PasswordAuthentication yesPubkeyAuthentication yesKbdInteractiveAuthentication yesUsePAM yesPermitRootLogin nosudo systemctl restart sshVerify the active config (not just the file):
sudo sshd -T | grep passwordauthentication# Must show: passwordauthentication yesIf it still shows no, grep for any other overrides:
sudo grep -r "PasswordAuthentication" /etc/ssh/
Configure rsync Daemon
HyperBackup’s UI integrates better with rsync daemon mode than SSH-based rsync.
rsyncd.conf
uid = synology-backupgid = synology-backupuse chroot = nomax connections = 10pid file = /var/run/rsyncd.pidlog file = /var/log/rsyncd.logtimeout = 300
[synology_backup]path = /backup/synologycomment = Synology HyperBackup Storageread only = nolist = yesauth users = synology-backupsecrets file = /etc/rsyncd.secretshosts allow = 100.0.0.0/8hosts allow = 100.0.0.0/8 restricts access to Tailscale IPs only.
rsyncd.secrets
synology-backup:YOUR_STRONG_PASSWORD_HEREsudo chmod 600 /etc/rsyncd.secretssudo chown root:root /etc/rsyncd.secrets
sudo systemctl enable rsyncsudo systemctl start rsyncsudo ss -tlnp | grep 873
Test from Synology
# List available modulesrsync synology-backup@100.72.22.38::# Should show: synology_backup    Synology HyperBackup Storage
export RSYNC_PASSWORD='YOUR_PASSWORD'rsync -avz --dry-run /volume1/homes/merox/ synology-backup@100.72.22.38::synology_backup/test/
Configure HyperBackup
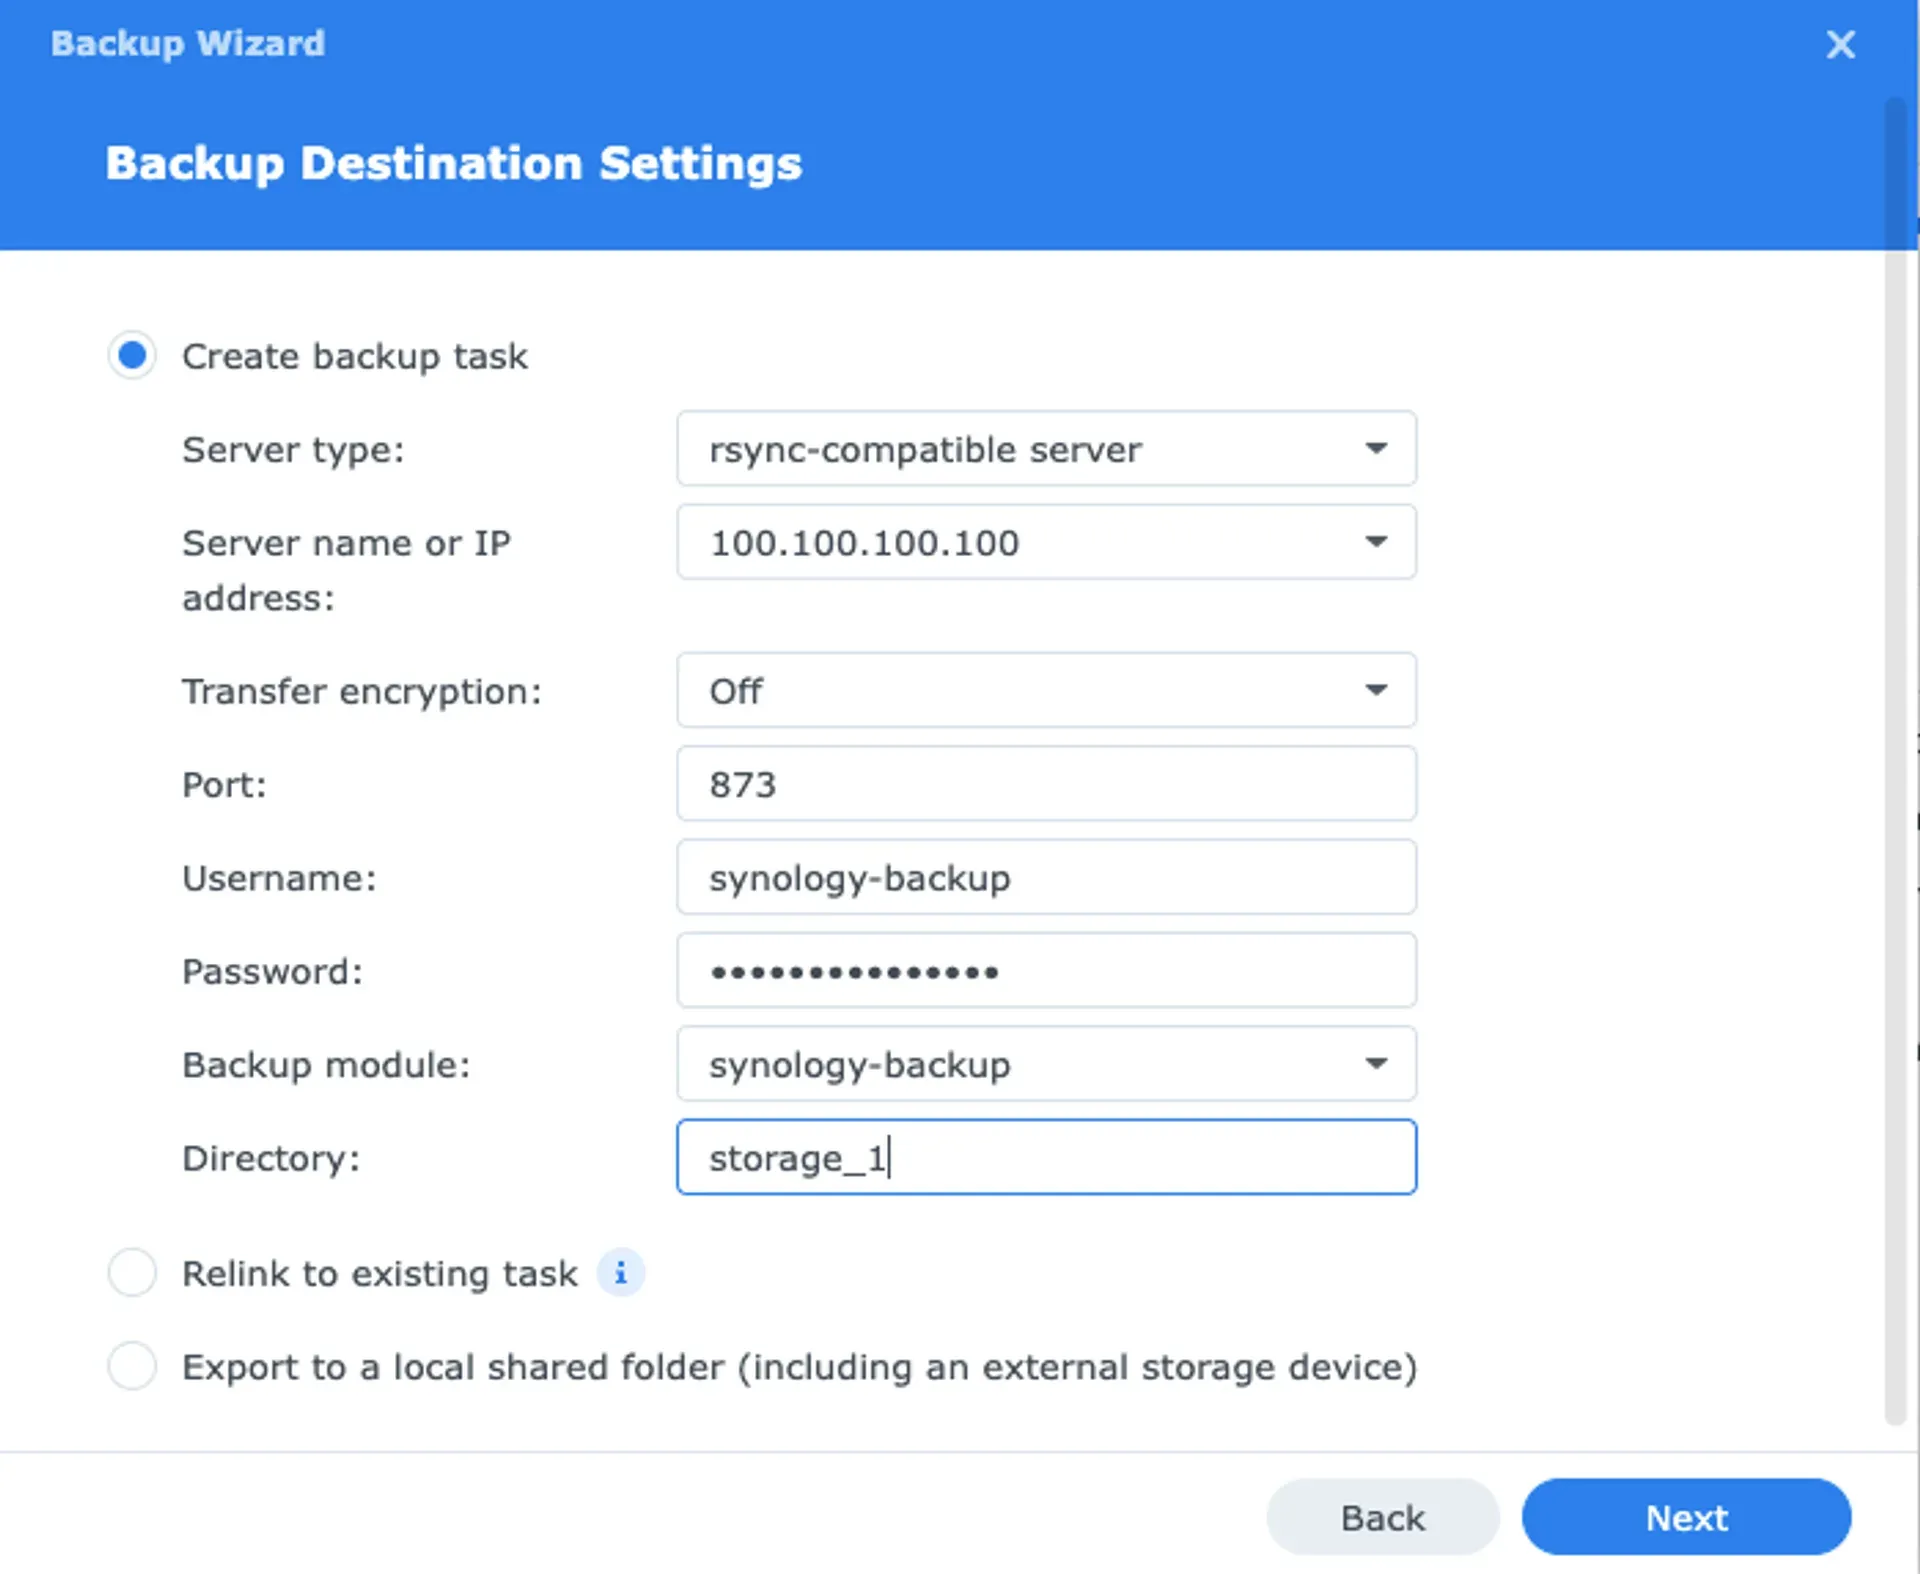
Open HyperBackup → + → Folders and packages → rsync → rsync-compatible server.
Connection settings:
- Server IP: your Tailscale IP (e.g.
100.72.22.38) - Port:
873 - Transfer encryption: Disabled (Tailscale already encrypts at network level)
- Username:
synology-backup - Password: from
/etc/rsyncd.secrets - Backup module: select
synology_backup
Warning
When using rsync daemon on port 873, transfer encryption must be disabled. The encryption option attempts SSH, which doesn’t apply to port 873. Tailscale handles encryption at the network layer.
Backup settings:
- Compress backup data: enabled
- Schedule: daily at 2–3 AM
- Integrity check: weekly
- Client-side encryption: enabled — if someone gets access to your Oracle Cloud instance, they can’t read the backups without your encryption password
Rotation: Smart Recycle with 3–5 versions. With ~136GB free and smart rotation, 50–100GB of source data with multiple versions is comfortable.
Monitoring
# Backup sizedu -sh /backup/synology/*
# Live during backupwatch -n 10 du -sh /backup/synology
# rsync logssudo tail -f /var/log/rsyncd.log
# Auth logssudo tail -f /var/log/auth.log | grep synology-backup
Netdata on the Oracle instance gives real-time disk I/O, Tailscale traffic, and storage trends at http://100.72.22.38:19999.

Troubleshooting
“Failed to connect to backup destination” — transfer encryption is enabled with rsync daemon. Disable it.
“Permission denied (publickey)” — Oracle’s SSH override is still blocking password auth. Run sudo sshd -T | grep passwordauthentication and check all files under /etc/ssh/sshd_config.d/.
Slow backup — the first run transfers everything and can take 8–24 hours for 100GB. Check whether Tailscale is using a relay instead of a direct connection with tailscale status. Enable compression in HyperBackup to reduce transfer size.
Running out of space:
du -h /backup/synology/ | sort -rh | head -20df -h /Reduce version retention or exclude large cache/temp folders from the backup task.
Security Hardening
After confirming everything works, migrate to SSH key auth:
On Synology:
ssh-keygen -t ed25519 -C "synology-hyperbackup"cat ~/.ssh/id_ed25519.pubOn Ubuntu:
sudo su - synology-backupmkdir -p ~/.sshnano ~/.ssh/authorized_keys# Paste Synology's public keychmod 600 ~/.ssh/authorized_keysexitThen re-disable password auth:
sudo nano /etc/ssh/sshd_config.d/50-cloud-init.conf# PasswordAuthentication nosudo systemctl restart sshFirewall (if ufw enabled):
sudo ufw allow from 100.0.0.0/8 to any port 22sudo ufw allow from 100.0.0.0/8 to any port 873Keep the instance updated:
sudo apt update && sudo apt upgrade -ysudo apt install unattended-upgrades -ysudo dpkg-reconfigure -plow unattended-upgradesWarning
If you enabled client-side encryption in HyperBackup, store the encryption password in a password manager. Without it, your backups are permanently unrecoverable.